If you’re working with a fast-growing development team or managing multiple projects, it’s all too easy for branches to spiral out of control. Bitbucket and Jira offer a structured way to keep code changes tidy, connect them directly to your work items, and make collaboration much smoother. Nailing your branching strategy helps your team move quicker, lowers bugs, and keeps releases on track.
Many developers get right to coding without mapping out how they’ll handle branches, merging, or tracking changes. I’ve learned, sometimes the hard way, that having a well-thought-out branching game plan connected to issue tracking can make life much simpler for everyone, whether they’re developers, testers, or project managers.
This guide breaks down how to link Bitbucket and Jira, set up a practical and scalable branching strategy, and shape a system your team can rely on even as your codebase grows larger.
Quick TL;DR for Busy Teams
Building a scalable branching strategy with Bitbucket and Jira means choosing a workflow that matches your team’s pace, linking Jira issue keys to your branches, and using Bitbucket’s handy features to automate tracking and pull requests. Start with the basics: create a main branch (often called main or master), branch out for each new feature, bugfix, or hotfix, naming them after related Jira issues, and merge with pull requests. Linking Bitbucket and Jira lets you follow code progress for every Jira ticket, boosting traceability and saving precious time when you release.
Understanding the Basics: Why Branching Strategy Matters
A branching strategy is simply a set of rules for naming and organizing branches in your version control. I used to think any branch name did the job, but it turns chaotic quickly when several people work on overlapping features. Branching strategies are crucial for big teams, parallel feature work, or when it’s essential to patch bugs on the fly.
Jira lays out your planned work, features, bugs, tasks, while Bitbucket handles your code changes. Connecting these two is vital. With the right integration, you’ll always know which line of code connects to which Jira issue and why. This traceability is gold for audits, rollbacks, and onboarding new contributors.
Step 1: Pick a Branching Model that Fits Your Team
Bitbucket comes with several built-in branching models, but not every project needs the same setup. Here are three common models I’ve worked with:
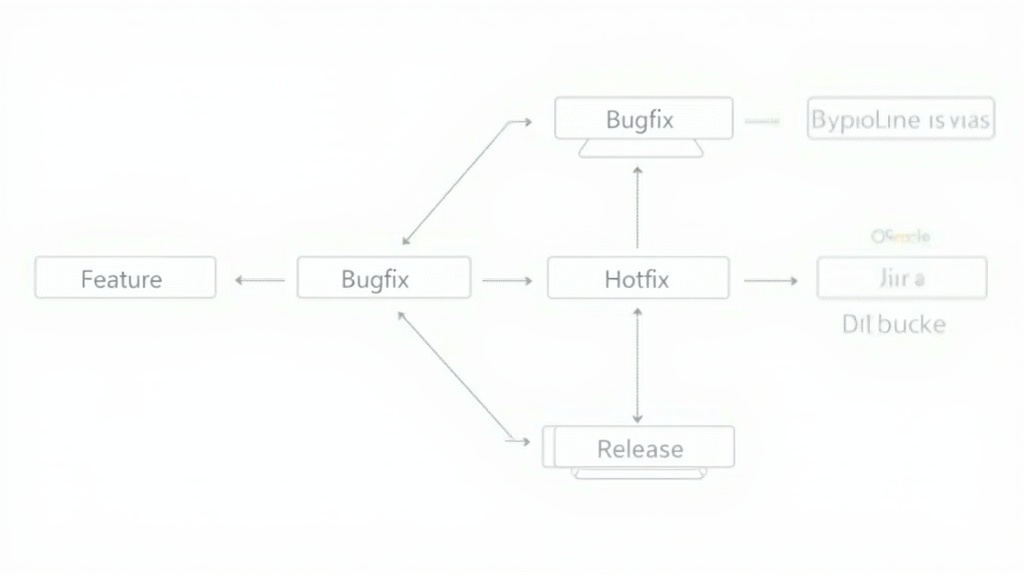
- Feature branching: Every feature or bugfix gets its own branch. These start from
mainand merge back in through a pull request. - Git Flow: Relies on
main,develop, and longer-lived support or hotfix branches. It’s ideal for big teams with regular releases but might be overkill for smaller groups. - Trunk based development: All changes go on shortlived branches, merged into
mainseveral times a day. It’s fast-paced, but you’ll need solid CI/CD to avoid chaos.
Usually, I start with feature branching since it is simple to explain and scales with team size. Choose an approach matching your team’s release speed, code review norms, and testing habits.
Step 2: Connect Bitbucket and Jira for Smarter Tracking
Both Bitbucket and Jira come from Atlassian, so integration is quick and very rewarding. Here’s my usual approach:
- Link your Jira and Bitbucket projects: Head to Bitbucket settings, locate Jira integration, and follow the steps. Now, any commit or branch with a Jira issue key (like
PROJ-123) will auto-update the development panel of that Jira ticket. - Reference Jira issue keys in branch names and commit messages: For instance,
feature/PROJ-123-new-login-page. Bitbucket highlights these on the connected Jira ticket.
This connection means I can always track which branch or pull request connects to each Jira issue, keeping everyone, developers, QA, and product owners, on the same page.
Step 3: Naming Conventions for Clarity and Scale
Branch name confusion can become a real pain point. Bitbucket lets you set up branch naming rules that help keep things tidy. Here are the naming styles I use regularly:
feature/PROJ-123-descriptionfor new featuresbugfix/PROJ-456-fixtitletypofor bug fixeshotfix/PROJ-789-urgentissuefor urgent production fixesrelease/1.2.3for prepping a release, if using Git flow
I always put the Jira issue key first, since Jira uses it as the main identifier for connecting commits and branches. This habit makes it much easier to track every change to its origin and requester.
Step 4: Using Pull Requests and Automation
Pull requests (PRs) are where reviews, tests, and merges happen. I set Bitbucket to require at least one reviewer, and make sure everyone puts the Jira key in PR titles or descriptions. Bitbucket can block merges if the corresponding Jira issue isn’t in the correct status, stopping last-minute mishaps come release day.
Automation is another key to sanity. For example, I set Bitbucket to close Jira tickets when PRs are merged or auto-transition them to QA. This keeps updates flowing to everyone and dials down manual check-ins. Get full details on Bitbucket’s automation in Atlassian’s automation docs.
Step 5: Scaling Up With Branch Permissions and Clean Up Rules
As your team expands, branch permissions become critical. Bitbucket permissions let you specify who’s allowed to push, merge, or delete branches. I typically lock down main and release so only pull requests can change them, protecting key code from unwanted changes.
When you have dozens, or even hundreds), of branches, schedule branch cleanups. Bitbucket can get rid of branches that have been merged, and Jira’s release reports help spot lingering code. By keeping branches tidy, you avoid confusion and reduce merge conflicts.
Summary: The Payoff of a Solid Branching Strategy
A good branching strategy in Bitbucket, tied to Jira issues, sets up a workflow where everyone knows what to do and how close a feature is to release. Clear naming, strong automation, and regular branch clean up all help minimize mixups and save time. Linking Jira tickets and branches improves reporting and makes fixing things easier when something goes wrong.
FAQ: Common Branching Questions
How do I choose the right branching model?
Pick what matches your team’s size and habits. For most small or medium groups, feature branching is straightforward and scales nicely. If you run strict release schedules, Git Flow has the structure you need, though it’s a bit heavier. Super fast teams with top-notch CI/CD might like trunk based, so long as everyone’s on the same page. Atlassian has details in their workflow guide.
What if several people need to work on the same feature?
Create feature branches and then layer in sub branches, like feature/PROJ-123-login/ui and feature/PROJ-123-login/api. Merge them into the main feature branch first, then put in a pull request as a group.
Can I connect more than one Jira ticket to a branch?
Absolutely. List several Jira keys in branch names or commit messages (for example, feature/PROJ-123-PROJ-456-design-update), and both tickets will be updated in Jira automatically.
What’s the best approach for cleaning up old branches?
After merging, set Bitbucket to auto-delete those branches or do regular manual sweeps. Always check with teammates before deleting a branch that might get rolled back or reused.
Where can I get more details?
Check Atlassian’s full resources for Bitbucket branching strategies, Jira integration, and Git workflows.
Where to Go Next
A solid branching strategy won’t magically solve everything, but it cuts confusion and lets your team fix bugs and build features more smoothly. Start simple, add rules only when your workflow asks for them, and keep every change connected to Jira tickets for better visibility. When you’ve got the basics running, look into automations for PR reviews, QA handoffs, and branch cleanup, these give you more time to focus on coding and less time chasing down missing features or solving last-minute merge conflicts.
Your Quick Checklist:
- Pick the branching model that matches your needs and release plan.
- Integrate Bitbucket and Jira to link tracking for all issues.
- Adopt a single naming convention and get the whole team on board.
- Control permissions and set up clean-up routines to keep your repo organized.
If you’re setting up your workflow for the first time or giving it a fresh look, a little upfront planning goes a long way. The benefits are clear: less chaos, better tracking, and a happier dev team in the long run.
You may also like – “How To Integrate Jira With Other Tools“